


HOW TO USE A DIGITAL PLANNER IN GOODNOTES (BEGINNER GUIDE)
SWITCH to digital planning
HOW TO digital plan
Welcome to your new digital space! If you’re new to digital planning, don’t worry. This guide will show you exactly how to start using a digital planner in GoodNotes, Noteful, Notability, Samsung Notes, or any annotation app. Most digital planning apps work in a very similar way, so once you learn the basics, you can use almost any app. Now let’s start planning!
DIGITAL planning bites
Planning with ADHD? This tutorial is designed to be simple, visual, and ADHD-friendly.
You can: read the quick steps or press play and follow the short videos. For this tutorial, we’ll use the Plan Better Freebie Vault to demonstrate the setup process.
If you want the FREEBIE VAULT, please click here.
Step 1 — Import Your Digital Planner Into GoodNotes (or Any Annotation App)
Before you can start digital planning, you first need to import your planner PDF into your note-taking app.
This takes less than a minute.
Once the file is inside your app, you can:
• write on it
• highlight
• add stickers
• jump between pages with hyperlinks
Just like a paper planner — but easier.
Start by accessing the Plan Better Freebie Vault. Inside the vault, scroll down until you see the download section. Enter your name and email address. Then click Subscribe. After subscribing, you’ll be taken to the download page. From there, you can: join the Facebook community or download your free planner files. Click Download Freebie. This will download the planner PDF file.
Import the Planner File. Once the file is downloaded, open your annotation app.
For example:
• GoodNotes
• Notability
• Noteful
• Samsung Notes
• or any PDF annotation app
Import the file as a new document. Then open it. That’s it. Your digital planner is now ready to use.
Step 2 — Understand the GoodNotes Layout - The Document Tab Bar
Before you start writing in your digital planner, it helps to understand the basic layout of the GoodNotes app.
The layout is simple once you know what each area does.
In this step, we’ll focus on one of the most important elements: The Document Tab Bar.
What Is the Document Tab Bar? At the top of the GoodNotes app, you’ll see a horizontal bar. This is called the Document Tab Bar. It shows all the notebooks, planners, or PDFs you currently have open. Think of it like tabs in a web browser. Each tab represents a different document.
Using the Document Tab Bar is simple.
Just tap on a tab to open that document.
For example, you might have open:
• your digital planner
• a notebook
• a journal
• a sticker book
You can switch between them instantly.
This makes digital planning much faster than searching through paper notebooks.
Step 3 — Understand the GoodNotes Layout - The Navigation Bar: Full View, Search and Ask goodnotes
Understand the Navigation Bar in GoodNotes.
Once you know how to switch between documents, the next thing to understand is the Navigation Bar.
This is the second row at the top of the GoodNotes screen, just under the document tabs.
The Navigation Bar helps you move around your planner quickly and find information without scrolling endlessly.
What does the Navigation Bar do? The Navigation Bar includes several useful tools that help you manage and explore your digital planner.
These tools allow you to:
• view all planner pages
• mark favorite pages
• search inside your planner
• quickly navigate large PDF planners
This is especially helpful if your planner contains hundreds of pages, as many digital planners do.
1. Page Overview (Thumbnail View)
The Page Overview button shows all the pages inside your planner.
When you tap it, you’ll see a grid view of every page in the document.
This makes it easy to:
• jump to a specific page
• see your planner layout
• move quickly between sections
Instead of scrolling page by page, you can simply tap the page you want to open.
2. Favorite Pages
Another useful tool is the Favorites feature.
When you mark a page as a favorite, GoodNotes highlights it so you can access it quickly later.
For example, you might favorite:
• your weekly planning page
• your monthly calendar
• your habit tracker
When you tap the favorite icon, the page will be marked and easy to find later.
3. Search Tool
The Search tool helps you find words inside your digital planner.
This is one of the biggest advantages of digital planning.
For example, if you search for a word like “lunch,” GoodNotes will show every page where that word appears.
This allows you to quickly locate notes, tasks, or appointments.
Instead of flipping through pages, you can find information instantly.
Step 4 — Understand the GoodNotes Layout - The Navigation Bar: Read mode ON/OFF, keyboard, recording
1. Read Mode (Turn Writing ON or OFF)
The Read Mode toggle controls whether you can write on the page.
When Read Mode is OFF, you can use the tools below the screen, such as:
• pen
• highlighter
• eraser
• shapes
This is when you are actively writing or planning. When Read Mode is ON, writing is disabled. This allows you to tap hyperlinks without accidentally drawing on the page.
For example, you can tap a hyperlink to jump directly to:
• June
• July
• weekly pages
• different planner sections
This makes navigation inside a digital planner much faster.
2. Keyboard Tool (Type Instead of Write)
The Keyboard Tool allows you to type text directly onto your planner pages. This is useful if you prefer typing instead of handwriting.
You can quickly add:
• notes
• reminders
• short task lists
Some people like combining both methods:
✍ handwriting for planning
⌨ typing for quick notes
Use whatever feels most natural.
3. Voice Recording Tool
GoodNotes also includes a voice recording feature. This allows you to record audio directly inside your planner page.
Just tap the microphone icon to start recording. You can use this for:
• quick voice reminders
• meeting notes
• brainstorming ideas
• memory prompts
When you stop recording, the audio file will appear inside your document. You can tap it anytime to play the recording again. This can be especially helpful if you think faster than you write.
Step 5 — Understand the GoodNotes Layout - The Navigation Bar: copy+paste button, favorites, export file
Now let’s look at three very practical tools in the GoodNotes Navigation Bar that help you organize and reuse your planner pages. These tools allow you to: copy planner pages, mark favorite pages, and export or share pages. Once you know these features, your digital planner becomes much more flexible than a paper planner.
1. Copy or Duplicate Pages
The Copy Page tool allows you to duplicate pages inside your planner. When you copy a page, you can choose where the new page should appear:
• before the current page
• after the current page
• at the end of the document
This is extremely useful when using planners. For example, you might want to duplicate:
• a weekly planner page
• a daily planning layout
• a habit tracker
• a notes page
Instead of recreating the layout every time, you can copy the page in seconds.
2. Import Images, Photos, or Documents
GoodNotes also allows you to insert external content directly into your planner.
You can add:
• images
• photos
• screenshots
• documents
• additional PDF pages
This is helpful if you want to attach things like:
• travel confirmations
• inspiration images
• work documents
• reference materials
Your planner can become a central hub for everything you need.
3. Add Pages to Favorites
The Favorites feature helps you quickly return to important pages. When you mark a page as a favorite, it becomes easier to locate later. Your favorite pages might be:
⭐ your weekly planning page
⭐ your monthly calendar
⭐ your habit tracker
⭐ your notes section
This saves time when navigating a large digital planner.
4. Export or Share Your Planner Pages
The Export tool lets you save or share your planner pages. You can export:
• a single page
• multiple pages
• the entire planner
And choose different formats such as:
• PDF
• image file
• GoodNotes document
You can also print your pages if needed.
This feature is useful if you want to:
• share notes
• send planner pages
• back up your planner
Step 6 — Understand the GoodNotes Layout - The Navigation Bar: copy+paste a page
Copy and Paste Planner Pages in GoodNotes. One of the biggest advantages of digital planners is that you can duplicate pages instantly. Instead of recreating the same layout again and again, you can simply copy and paste a page wherever you need it. This makes building your planning system much faster.
1. How to Copy a Page
To duplicate a page in your digital planner:
Open the page you want to reuse. Tap the page options menu. Select Copy Page. GoodNotes will copy the entire page layout. This works for any type of page, including:
• daily planners
• weekly spreads
• habit trackers
• notes pages
2. How to Paste the Page
After copying the page:
Navigate to where you want the new page. Tap Paste Page. Choose where the page should appear. You can paste it:
• before the current page
• after the current page
• at the end of the document
Once pasted, the duplicated page will appear immediately in your planner.
3. How to Delete a Page
If you accidentally duplicate a page or no longer need it, you can remove it easily.
Simply: Open the page menu. Tap Delete Page. Move it to the trash. The page will disappear from your planner.
Step 7 — How to Use the Toolbar Tools in GoodNotes
Now that you understand the navigation tools, it’s time to look at the toolbar tools in GoodNotes. These are the tools you’ll use the most when writing in your digital planner. They allow you to: write, highlight, erase, and fix mistakes quickly. Once you learn these basics, using a digital planner becomes very natural.
1. Turn Off Read Mode First
Before using the writing tools, make sure Read Mode is turned OFF. When Read Mode is off, you can access the toolbar tools at the bottom of the screen. These tools allow you to edit your planner pages.
2. Undo and Redo Buttons
The Undo button lets you quickly remove something you just wrote. For example, if you write a word and want to erase it instantly, simply tap Undo. The Redo button does the opposite. If you undo something by mistake, you can tap Redo to bring it back. These two buttons make digital planning much less stressful, because mistakes are easy to fix.
3. Pen Tool (Writing Tool)
The Pen Tool is the main writing tool in GoodNotes. With the pen tool, you can:
• write notes
• plan your day
• create task lists
You can also customize the pen by choosing:
• different colors
• different line thickness
This allows you to create a planning style that works for you.
4. Chalk Brush Tool
The Chalk Brush is a softer writing tool. It creates a slightly textured look, which many people like for:
• creative notes
• decorative planning
• aesthetic details
Some digital planners use the chalk brush to create a journal-style look.
5. Eraser Tool
The Eraser tool allows you to remove anything you wrote. Just tap the eraser and erase the area you want to clean.
You can erase:
• words
• drawings
• highlights
This is much easier than correcting mistakes in a paper planner.
6. Highlighter Tool
The Highlighter tool is perfect for marking important information. You can use it to highlight:
• priorities
• deadlines
• key notes
Many people also use different highlight colors to organize their planning visually.
Step 8 — How to Use Color Presets, Eraser, and Highlighter in GoodNotes
One of the fun parts of digital planning is using colors to organize your pages. GoodNotes allows you to choose custom colors, save presets, highlight important tasks, and erase mistakes easily. These tools help you create a planner that feels clear, calm, and visually organized.
1. How to Choose a Color
To change the color of your pen, highlighter, or brush. Tap the color circle in the toolbar. Select a color from the palette.
The same color system works for:
• the pen tool
• the highlighter tool
• the chalk brush
This allows you to keep a consistent color style across your planner.
2. Save Your Favorite Colors (Color Presets)
If you use the same colors often, you can save them as presets.
To add a custom color:
Tap the color selector.
Choose a color you like.
You can also enter a HEX color code for exact shades. Add it to your color presets. Your favorite colors will now appear in the quick-access color row, so you can select them instantly. This makes planning much faster.
3. Use the Highlighter Tool
The Highlighter tool is perfect for marking important information in your planner.
You can use it to highlight:
• priorities
• deadlines
• important notes
• completed tasks
Many people use different colors to create a visual planning system.
For example:
🟡 yellow → important tasks 🟢 green → completed tasks 🔵 blue → meetings or appointments
4. Use the Eraser Tool
The Eraser tool removes anything you wrote or highlighted. Simply select the eraser and tap or swipe over the area you want to delete.
You can erase:
• handwriting
• drawings
• highlights
This makes digital planning much more forgiving than paper planning, because mistakes are easy to fix.
Step 9 — How to Use Tape and Shape Tools in GoodNotes
Now let’s explore two creative tools in the GoodNotes toolbar that help you organize and customize your digital planner pages: the Tape tool & Shape tool. These tools are useful when you want to create tabs, separate sections, or add visual structure to your planner.
1. Use the Tape Tool
The Tape tool allows you to draw tape-like strips across your page. Many digital planners use this tool to create visual tabs or labels.
To use it:
Select the Tape tool.
Choose a color from your presets or color picker.
Adjust the thickness if needed.
Drag across the page to create the tape strip.You can use tape to:
• mark sections in your planner
• create headers
• highlight important areas
• build visual tabs
It’s a simple way to make your planner clearer and easier to navigate.
2. Use the Shape Tool
The Shape tool helps you create clean shapes and lines automatically.
For example, you can draw:
• straight lines
• boxes
• circles
• arrows
Even if your drawing isn’t perfect, GoodNotes will straighten the shape automatically.
This tool is useful when you want to:
• create checkboxes
• build simple layouts
• separate sections on a page
• design custom planner tabs
Step 10 — How to Use the Lasso Tool in GoodNotes (The Magic Tool)
The Lasso Tool is one of the most powerful tools in GoodNotes. Many digital planners call it the “magic tool” because it allows you to select, move, resize, copy, or delete almost anything on your page. If you learn how to use this tool well, editing your digital planner becomes much faster and easier.
1. What the Lasso Tool Does
The Lasso Tool allows you to select elements on your planner page.
Once something is selected, you can:
✔️ move it
✔️ resize it
✔️ copy it
✔️ paste it
✔️ delete it
This works with many elements, including: handwriting, shapes, text, stickers, and images.
2. How to Select Something
To use the Lasso Tool:
Select the Lasso Tool from the toolbar.
Draw a circle or square around the element you want to select.
The selected item will become active. Once selected, you can move the object anywhere on the page.
3. Move and Adjust Planner Elements
After selecting an item, simply drag it to a new location.
This is very useful for adjusting things like:
• planner tabs
• stickers
• icons
• text boxes
Instead of rewriting something, you can simply move it where you want it.
4. Copy and Paste Objects
The Lasso Tool also allows you to duplicate items easily.
Once an object is selected:
Tap Copy.
Tap Paste.
You now have a duplicate of that element.
This is perfect when using things like:
• stickers
• icons
• checkboxes
• decorative elements
5. Cut or Delete Items
If you no longer need something on the page, you can also:
• cut it
• delete it
This allows you to quickly clean up your planner page without starting over.
6. Change Colors or Adjust Elements
After selecting an object with the Lasso Tool, you can also make small edits, such as:
• changing colors
• resizing elements
• adjusting placement
This gives you full control over your planner layout.
Why the Lasso Tool Is So Powerful
The Lasso Tool makes digital planners much more flexible than paper planners. Instead of rewriting or erasing repeatedly, you can simply: move things around, duplicate elements, and adjust your layout. This saves time and keeps your planner clean and organized.
Step 11 — How to Use Stickers, Sticky Notes, Images, and Text in GoodNotes
Now let’s explore the creative tools that allow you to personalize and organize your digital planner. These tools help you add: digital stickers, sticky notes, images, typed text. They make your planner more visual, more organized, and more fun to use.
1. Add Digital Stickers
Stickers are one of the most popular features in digital planners.
To add a sticker:
Tap the Stickers tool.
Open your sticker collection.
Choose a sticker you want to use. Tap the page to insert it. Once placed on the page, you can:
• move it
• rotate it
• resize it
Many people use stickers to highlight things like:
📌 meetings
📌 reminders
📌 priorities
📌 mood tracking
2. Use Sticky Notes
Sticky notes work like small reminder notes inside your planner.
To add one:
Tap the Sticky Note tool.
Place the note on your page. Write your message inside it. You can also resize the sticky note to make it:
• taller
• wider
• smaller
Sticky notes are perfect for:
• quick reminders
• temporary notes
• brainstorming ideas
3. Insert Images
You can also add images directly into your planner. This is helpful if you want to include:
• screenshots
• inspiration photos
• visual references
• documents
After inserting an image, you can:
• resize it
• move it
• rotate it
Images allow your planner to become more like a visual workspace.
4. Write Text with the Text Tool
If you prefer typing instead of handwriting, you can use the Text Tool.
To add typed text:
Select the Text tool.
Tap where you want to write. Start typing. You can customize your text by adjusting:
• font style
• font size
• text color
• paragraph alignment
You can also set your favorite formatting as the default style.
5. Other Useful Tools
GoodNotes also includes a few additional tools that can help with specific tasks.
For example:
• Search tool – find words inside your planner
• Measurement tool – measure elements on the page
• Clock or timer tools – useful for time tracking
Most annotation apps include similar tools, so once you learn them in GoodNotes, you’ll recognize them in other apps too.
You’re Ready to Start Digital Planning
Take a few minutes to explore your planner, test the tools, and create a system that works for your daily routine. Digital planning becomes easier the more you use it, and soon it will feel just as natural as writing in a paper planner—only faster, cleaner, and far more customizable.
Below, you’ll find a few recommended planners and resources to help you go even further with your digital planning setup. Explore them, find the style that fits your workflow, and start building a planning routine that keeps your ideas, tasks, and goals beautifully organized.
Happy planning!

OUR MONTHLY DIGITAL STICKERS PACK
Increase productivity, and decrease stress!
Discover how intentional digital planning tools can simplify your workflow, sharpen your focus, and help you achieve more with less mental clutter. In this post, you'll…
NEED A NEW DIGITAL PLANNER....MAKE IT EDITORIAL
the editorial ISSUE
2026 Premium Editorial Digital Planner – ADHD-Friendly, Daily & Dated, Monday–Sunday
Set your goals for the month. Create your vision board. Define your priorities with intention. Cross off what no longer serves you. And plan your months and weeks with clarity.
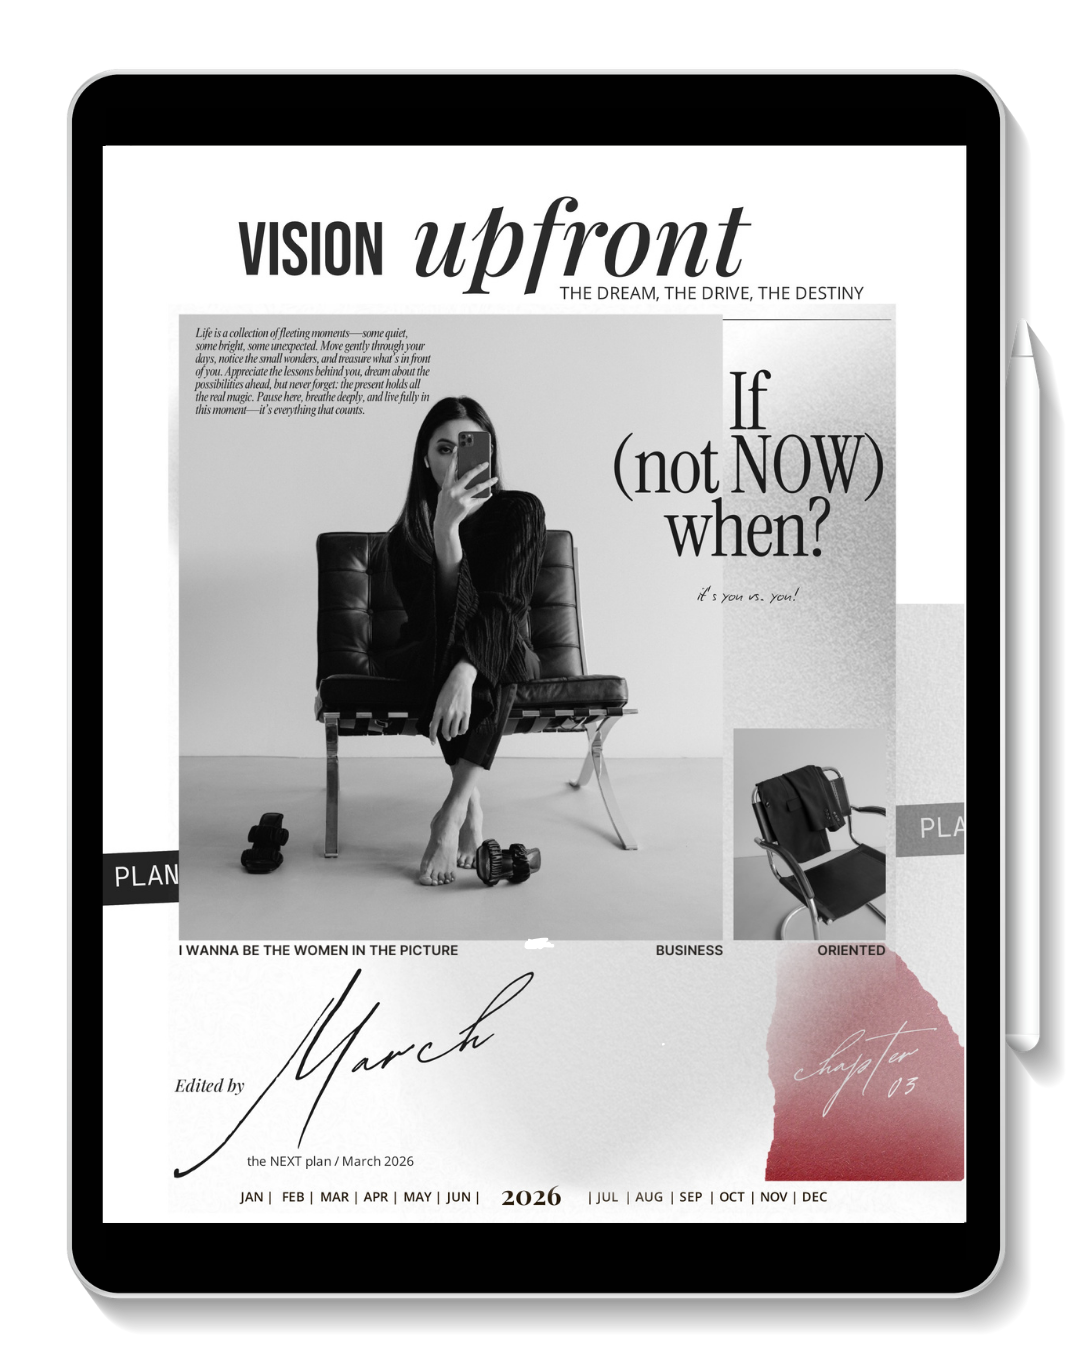
Plan. Focus. Structure. Intention. A space for minimalist digital planning and beautifully organized living.